7 Best Ways to Prepare a Concrete Subfloor for Installation

Time:2026-09-28 Author:Ethan
0%

A successful floor installation starts below the visible surface. Concrete can look smooth while hiding dust, hairline cracks, old adhesive, or moisture. These small problems may weaken adhesive bonds and cause planks or tiles to shift. How to prepare a concrete subfloor for installation is not just a cleaning question. It involves checking the slab, choosing suitable repairs, and following the flooring manufacturer’s requirements.

This guide covers seven practical preparation steps, from removing debris to testing for moisture and checking flatness. A straightedge can reveal dips. A plastic sheet or approved test kit may help identify moisture concerns, though test methods vary. Wear appropriate eye and respiratory protection when sanding or removing residue, and avoid disturbing materials that may contain hazardous substances until they have been assessed. Details matter.

Preparation also takes patience. A patch can feel dry on top but remain damp underneath. Some older slabs are uneven, and no quick fix makes every floor installation-ready. When conditions fall outside product specifications, consult the manufacturer or a qualified flooring professional. That is sometimes the less satisfying answer. It is also the safer one. Use the steps as a careful starting point, not a substitute for product instructions or an assessment of unusual slab conditions.
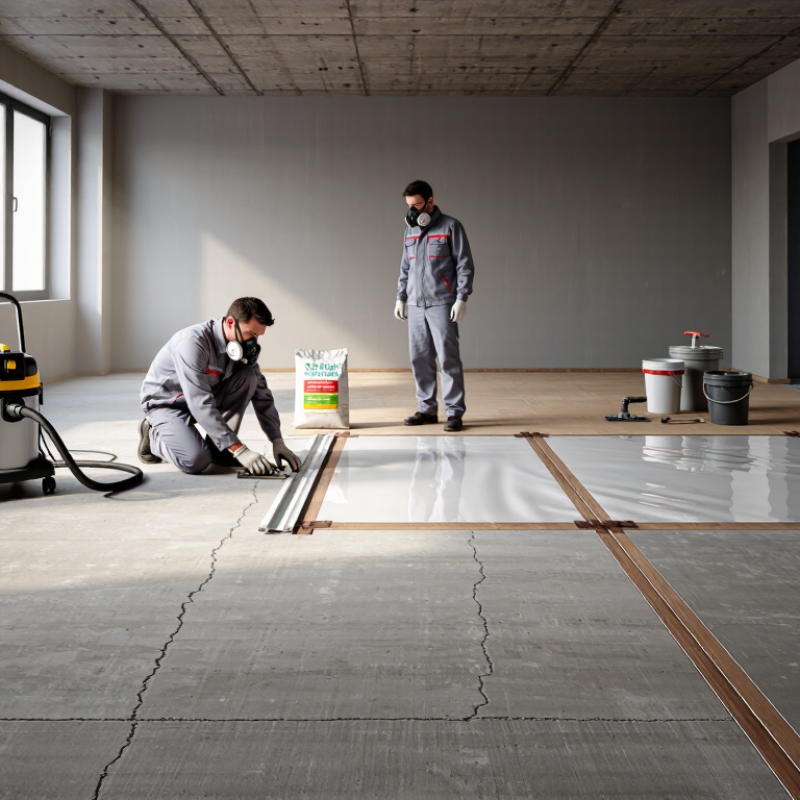
7 Best Ways to Prepare a Concrete Subfloor for Installation

Inspect and Clean Concrete; Follow ASTM F710 Subfloor Requirements

A concrete slab can look ready while still holding dust, curing residue, or excess moisture. ASTM F710-22 calls for a concrete floor to be dry, clean, smooth, and structurally sound before resilient flooring is installed. Start with a bright work light and inspect for cracks, loose patches, paint, and adhesive residue. Scrape high spots, then vacuum thoroughly; a broom can leave fine powder behind. Do not guess. ASTM F710 also calls for moisture and pH testing, even when a slab appears dry. The standard does not set one universal acceptable moisture limit, so compare results with the flooring system’s published requirements.

For in-slab relative humidity testing, ASTM F2170 specifies sensor placement at 40% of slab thickness when drying occurs from one side, or 20% when both sides dry. Sensors need at least 24 hours to equilibrate before readings are taken. Record each test location, result, and date; a damp doorway or exterior wall may differ from the room’s center. Check pH too, using the method and limits required by the flooring system. Clean and test again if construction dust settles after preparation. It is easy to rush this step, especially when the surface feels hard and dry. That feeling is not a measurement.

Remove Contaminants and Repair Cracks Before Flooring Installation

Concrete may look clean while still carrying a thin film of paint, oil, or old adhesive. These residues can weaken the bond beneath new flooring. Scrape loose material with a floor scraper, then vacuum carefully along walls and corners. Dust travels everywhere. Avoid soaking the slab; standing water can enter cracks and delay drying. If a residue is stubborn, check that the removal method is suitable for the flooring system and concrete surface.

Inspect the bare slab under bright, low-angle light. Mark cracks, chipped edges, and shallow pits with painter’s tape. Clean each defect with a stiff brush and vacuum out the dust before applying a repair compound rated for concrete floors. Let it dry. Sand or scrape high spots until the patch sits level with the surrounding slab. I have seen a neat-looking patch telegraph through thin flooring because its edge was left raised. That detail is easy to miss.

Not every crack is a simple surface defect. A crack that widens, shifts, or returns after repair may signal movement; get it assessed before covering it. Check the slab’s moisture using a test method accepted by the flooring manufacturer, since a dry-looking surface can still release moisture. Keep records of the test and repairs. The extra step can feel fussy, but guessing is worse.

Prepare a Concrete Subfloor: Check Flatness Before Installation

Typical maximum substrate variation for ceramic or porcelain tile, measured with a 10 ft straightedge.

ANSI A108.02 gives a maximum variation of 1/4 in for tiles with all edges shorter than 15 in, and 1/8 in when at least one edge is 15 in or longer. Check the applicable standard and flooring manufacturer’s instructions. Before installation, remove contaminants and repair cracks; then use a straightedge to identify uneven areas that may need correction.

Check Flatness: ANSI A108.02 Allows 1/4 in. per 10 ft. for Small Tile

A flat concrete slab is not merely cosmetic; it helps tile sit evenly and reduces lippage. ANSI A108.02 allows no more than 1/4 inch of variation over 10 feet for tiles with all edges shorter than 15 inches. For larger-format tile, the tolerance tightens to 1/8 inch over 10 feet. These industry-standard limits are useful checks, not a promise that every floor is ready for setting.

Lay a 10-foot straightedge across the slab in several directions, including doorways and visible dips. Measure the largest gap with a ruler or feeler gauge; a small wedge can help reveal it. Mark high spots with chalk and low areas with removable tape. Check shorter spans too, since a floor can pass the 10-foot check yet have a sharp local hump. Dust and glare can hide defects. I’ve missed shallow dips before.

Grind down isolated high spots with suitable dust control, then use a compatible patching or leveling material for depressions. Follow its preparation and curing instructions. Recheck the surface after repairs, and confirm moisture conditions separately; flatness does not measure moisture. Keep a simple sketch of readings and repaired areas. It is not a laboratory report, but it makes overlooked spots easier to catch.

Test Moisture: ASTM F2170 Reports RH; F1869 Reports MVER

Moisture testing is not a formality; it checks conditions the finished floor will inherit. ASTM F2170 measures relative humidity inside a concrete slab with probes placed in drilled holes. After the holes equilibrate, readings show internal RH at specified depths. Concrete may look dry while retaining moisture below its surface. Small detail, big difference.

ASTM F1869 uses calcium chloride placed on the exposed slab to measure moisture vapor emission rate, or MVER. Results are reported in pounds per 1,000 square feet over 24 hours. These tests measure different things, so their results are not directly interchangeable. Test several locations, including near exterior doors, plumbing, and visibly discolored areas. Keep the building’s temperature and humidity stable during testing, and follow the flooring system’s stated limits. One reading can miss a wet spot; I have seen how easy it is to trust a convenient test location. Record the test method, location, date, and result before installation.

7 Best Ways to Prepare a Concrete Subfloor for Installation — Test Moisture: ASTM F2170 Reports RH; F1869 Reports MVER
Step Preparation method What to do How to verify readiness
1 Inspect the slab Check for cracks, spalling, weak areas, old coatings, and signs of water entry. Identify whether the slab is on or below grade and whether a vapor retarder is present. Document visible conditions and repair needs. Investigate active water intrusion before installing flooring.
2 Remove contaminants Remove dust, curing compounds, paint, oil, adhesive residue, and other materials that could interfere with the flooring or adhesive bond. Use a removal method suitable for the contaminant and project requirements. The surface should be clean and free of bond-inhibiting residue. Do not rely on a new floor covering to conceal contaminants.
3 Check moisture using ASTM F2170 Use in-situ probes to measure relative humidity (RH) within the concrete slab. Follow the test method for probe placement, conditioning, and reporting. The report gives RH as a percentage at each test location. Compare results with the written limits for the selected flooring, adhesive, and preparation system.
4 Check moisture using ASTM F1869 Use the anhydrous calcium chloride test to measure the moisture vapor emission rate (MVER) from the concrete surface over the test period. The report expresses MVER in pounds per 1,000 square feet per 24 hours. This is a different measurement from RH; use the test and limits required for the flooring system.
5 Measure pH when required Test the concrete surface pH using the method specified for the flooring or adhesive system. Moisture and alkalinity can affect flooring materials and adhesive performance. Record the readings and compare them with the product requirements. Do not assume one pH range applies to every installation.
6 Repair and level the surface Fill suitable cracks and patch low spots with compatible materials. Grind or otherwise correct high spots where appropriate, while avoiding damage to embedded services. Check flatness with a straightedge and confirm that the slab meets the flooring manufacturer’s stated tolerance. Flatness requirements vary by flooring type.
7 Clean and recheck before installation Remove preparation dust and debris. Confirm that repairs and leveling materials have cured as directed and that testing and site conditions meet project requirements. Keep moisture, pH, repair, and inspection records. Proceed only when the prepared slab satisfies the requirements for the complete flooring system.

Check Concrete pH and Apply Primer Within Product-Specified Limits

Concrete pH can affect how well flooring adhesive bonds, so test before applying primer. Sweep and vacuum the slab, then use a pH test kit or meter according to its instructions. Check several spots, including near walls and areas that look darker or feel damp. One reading is not enough. Small differences matter. Record the results and compare them with the flooring and primer instructions; acceptable limits vary by product. A pH reading also does not replace moisture testing, since the two checks measure different conditions. I still find this step easy to rush, especially when the slab looks dry.

Choose a primer approved for the flooring system and apply it only when pH, moisture, and temperature fall within its specified limits. Stir or dilute it only as directed, and use the stated coverage rate. A small roller or brush helps reach edges without leaving puddles. Let the primer dry for the required time, but do not assume longer is always better; some products have a limited installation window. If readings exceed the stated limits, pause and check the product’s technical guidance before proceeding. Guessing here can mean poor adhesion later.

FAQS

Why remove paint, oil, and old adhesive before installing flooring?

These residues can weaken the bond beneath new flooring. Scrape loose material and vacuum along walls and corners. Dust travels everywhere.

How should small cracks and pits be repaired?

Mark each defect with tape, then brush and vacuum out dust. Apply a concrete-floor repair compound and let it dry. Sand raised edges flush.

When should a crack be assessed before flooring installation?

Get a crack checked if it widens, shifts, or returns after repair. It may signal slab movement. Don’t guess.

Why test concrete moisture if the slab looks dry?

Moisture can remain below the surface and affect the finished floor. A dry appearance is not enough.

What is the difference between ASTM F2170 and ASTM F1869?

F2170 uses probes in drilled holes to measure internal relative humidity. F1869 uses calcium chloride to measure moisture vapor emission. The results are not interchangeable.

Where should moisture tests be taken?

Test several locations, including near exterior doors, plumbing, and discolored areas. One convenient spot can miss a wet patch.

How can testing conditions be kept consistent?

Keep the building’s temperature and humidity stable. Follow the flooring system’s stated limits. Small detail, big difference.

What should be recorded before installation?

Record the test method, location, date, and result. Keep notes about repairs, too. It may feel fussy, but it helps.

Conclusion

How to prepare a concrete subfloor for installation begins with a careful inspection and thorough cleaning. Remove dust, debris, grease, adhesive residue, and other contaminants that could interfere with flooring materials. Repair cracks and surface damage before installation, and make sure the concrete meets applicable subfloor requirements, including ASTM F710.

Next, check that the surface is sufficiently flat; for small tile, ANSI A108.02 allows a variation of up to 1/4 inch over 10 feet. Test moisture using the appropriate methods: ASTM F2170 measures relative humidity within the concrete, while ASTM F1869 measures moisture vapor emission rate. Check the concrete’s pH as well, then apply a suitable primer only when needed and within the limits specified for the flooring system. These steps help create a clean, sound, and properly prepared surface for installation.

Ethan

Ethan

Ethan is a seasoned marketing professional with a deep expertise in our company's innovative product line. With a passion for sharing knowledge and insights, he takes the lead in regularly updating our corporate blog, where he explores industry trends, product features, and effective marketing......