Preparing a concrete subfloor for installation is crucial for a successful project. Industry expert, John Peterson, states, "A solid foundation is key to any flooring." Properly preparing the subfloor ensures longevity and durability of your flooring.
Many homeowners underestimate the importance of preparation. It involves cleaning, leveling, and moisture testing. Each step plays a significant role in preventing future issues. Skipping steps can lead to costly repairs later.
When you think about how to prepare a concrete subfloor for installation, envision a clean, smooth surface that supports your flooring choice. Attention to detail is vital. Poor preparation can result in uneven floors or cracking. Investing time in this process pays off with a stable and lasting finish.
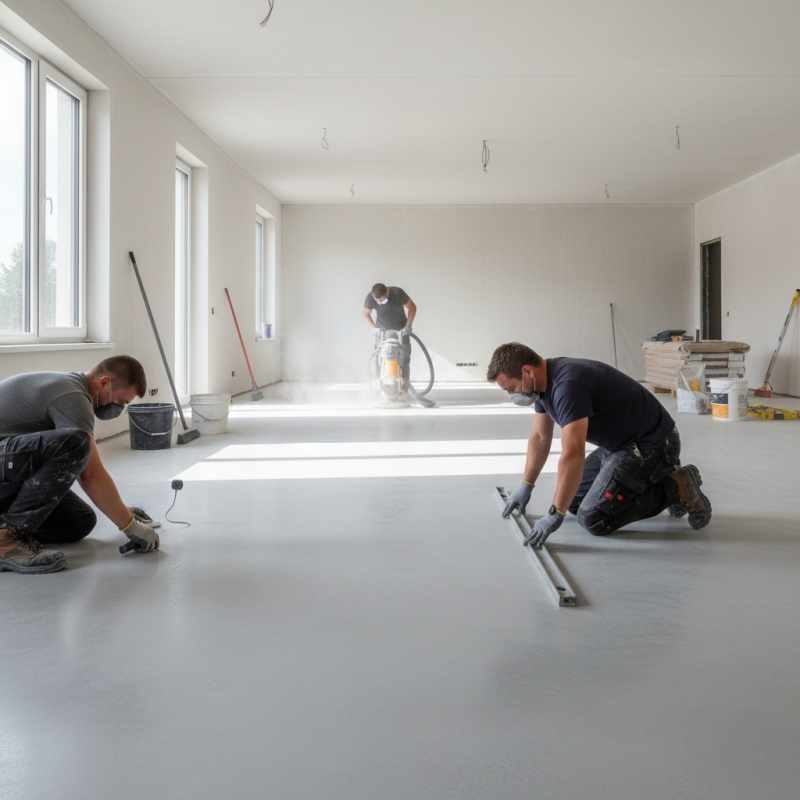
A properly prepared concrete subfloor is crucial for any flooring installation. It serves as the foundation for your chosen material, affecting durability and appearance. An uneven subfloor can lead to cracks, warping, or other issues. It is essential to assess the moisture content in the concrete. Too much moisture can result in severe damage over time.
Surface cleanliness is another critical factor. Dust, debris, or oils can interfere with adhesion. Failure to clean the surface thoroughly can diminish the performance of the flooring. Remember, a clean subfloor is the first step toward a successful installation.
Furthermore, the leveling of the concrete surface cannot be overlooked. Even minor variations can lead to problems later, such as gaps or bulges. A flat, smooth foundation enhances stability and longevity. Consider that imperfections may arise, requiring adjustments or additional work. Investing time and effort into a solid subfloor can save significant costs down the line.
Assessing the condition of your existing concrete subfloor is crucial before installation. Start by examining the surface for
cracks, unevenness, or stains. Small cracks can often be repaired, while
larger issues might require professional attention. Use a level to check for flatness.
If the floor dips or rises, it needs to be addressed.
Tips: Document any imperfections. Take pictures and note their locations.
This will help you track repairs and improvements.
Pay attention to moisture levels as well. A damp subfloor can lead to mold and damage over time. Use a moisture meter to ensure levels are within
acceptable limits. If moisture is detected, consider applying a waterproof sealant before installation.
Tips: Allow adequate drying time for any repairs or sealants. It’s tempting to rush
the process, but patience pays off in the long run. Inspect regularly as you work. A thorough assessment during
preparation can save time and money later.
Cleaning and repairing surface imperfections on a concrete subfloor is crucial. A smooth subfloor ensures better adhesion for flooring materials. Start by inspecting the surface for cracks, chips, or uneven areas. You may find small cracks that can be easily overlooked. Use a wire brush or vacuum to remove loose debris and dust.
Next, fill any noticeable cracks with a concrete patching compound. This compound should match the existing concrete closely. Apply it carefully, ensuring it’s level with the surrounding area. Be patient; if the repair isn’t seamless, the final floor may end up looking uneven. After the patches dry, sand the area lightly for a smooth finish.
Finally, check for moisture issues. A humid subfloor can lead to mold and damage. If the surface feels damp, consider drying it out before proceeding with installation. Not all imperfections can be fixed perfectly. Some flaws might remain, but addressing the major ones will still enhance the overall quality of your flooring project.
| Step | Description | Tools Required | Time Estimate |
|---|---|---|---|
| 1 | Clear the area of debris and furniture. | Broom, vacuum. | 30 minutes |
| 2 | Inspect for cracks and surface imperfections. | Flashlight, magnifying glass. | 15 minutes |
| 3 | Fill cracks with a suitable filler. | Concrete filler, putty knife. | 1 hour |
| 4 | Level the surface using a self-leveling compound. | Self-leveling compound, trowel. | 2-3 hours |
| 5 | Allow the leveling compound to cure completely. | None. | 1-2 days |
| 6 | Clean the surface thoroughly to remove dust. | Vacuum, damp mop. | 30 minutes |
| 7 | Check moisture levels in the concrete. | Moisture meter. | 15 minutes |
| 8 | Apply a moisture barrier if necessary. | Plastic sheeting, tape. | 30 minutes |
| 9 | Install a floor underlayment for added support. | Underlayment material, utility knife. | 1 hour |
| 10 | Begin the final flooring installation process. | Flooring materials, tools as required. | Varies by material |
Moisture testing is crucial for concrete subfloors. High moisture levels can damage flooring materials and lead to costly repairs. A common method involves using a moisture meter to assess the slab's moisture content. It is essential to conduct this testing at various points and times. This ensures an accurate understanding of the moisture levels present.
Mitigation techniques can help in managing moisture issues. One effective method is applying a moisture barrier. This creates a protective layer that reduces moisture transmission. Another technique involves using desiccants during installation. These materials absorb excess moisture from the air and prevent it from reaching the flooring. It’s vital to address these concerns early to ensure a successful installation.
Ignoring moisture issues may lead to problems down the line. Some installers overlook the importance of thorough testing. They might rush through the process, assuming it’s sufficient. This can lead to complications, such as mold growth or warping. Taking the time to implement proper moisture testing and mitigation techniques can significantly enhance the longevity of the flooring.
Applying a suitable primer or sealant on a concrete subfloor is essential before installation. This step plays a significant role in the adhesion process. Research indicates that using a quality primer can improve bond strength by up to 50%. It also helps in mitigating moisture issues, which are critical in preventing mold development beneath installations.
Choosing the right primer or sealant involves understanding the specific conditions of your concrete slab. Industry data suggests that improper application can lead to complications, such as bubbling or peeling. It’s essential to assess the concrete surface. Inspect for cracks and unevenness. Patching these imperfections before applying a primer is crucial. Neglecting this can compromise the overall integrity of the finished floor.
Moisture content is another factor that must be measured. A vapor barrier may be necessary if humidity levels exceed 75%. This preventive measure can drastically reduce the risk of adhesive failures. Be cautious; oversights in preparation often lead to significant future costs. Proper priming creates a robust foundation, ensuring longevity and performance for your flooring.
: A well-prepared subfloor ensures durability and appearance for flooring, preventing issues like cracks and warping.
Inspect for cracks, unevenness, and stains. Use a level to assess flatness and address any dips or rises.
Use a moisture meter to confirm if the moisture levels are within acceptable limits before installation.
Dust and debris can impede adhesion, leading to diminished performance of the flooring over time.
Even slight variations can create gaps or bulges, affecting the stability and longevity of your flooring.
Document them with pictures and notes. This will help you track necessary repairs during the preparation process.
Yes, a suitable primer enhances bond strength and mitigates moisture issues under the flooring.
Skipping this step can lead to bubbling or peeling of the flooring, compromising its overall integrity.
If humidity levels exceed 75%, a vapor barrier can reduce the risk of adhesive failures significantly.
Allow adequate drying time for repairs. Rushing can lead to mistakes and added costs later on.
Preparing a concrete subfloor for installation is crucial for ensuring a durable and stable foundation for your flooring choice. To begin, it’s important to understand why a properly prepared concrete subfloor is essential, as it impacts the overall performance and longevity of the flooring. Assessing the condition of your existing subfloor involves checking for cracks, unevenness, and other defects that could affect installation.
Next, cleaning the surface and repairing any imperfections is vital to provide a smooth base. Moisture testing should also be conducted, as excess moisture can lead to flooring issues down the line. If issues are found, appropriate mitigation techniques may be necessary. Finally, applying a suitable primer or sealant before installation can enhance adhesion and performance. By following these steps, you will effectively learn how to prepare a concrete subfloor for installation, setting the stage for a successful flooring project.

Prairie Floor